Running Your First Scan
A complete walkthrough of running your first security scan with Kai, from file selection to reviewing results. Currently focused on the VS Code extension workflow.
Before You Begin
Make sure you have:
- ✅ Kai extension installed and authenticated
- ✅ A git repository opened in VS Code with committed files
- ✅ Internet connection for cloud runtime
New to Kai? Start with a smaller project (10-50 files) for your first scan to get familiar with the process.
Step 1: Access the Kai Panel
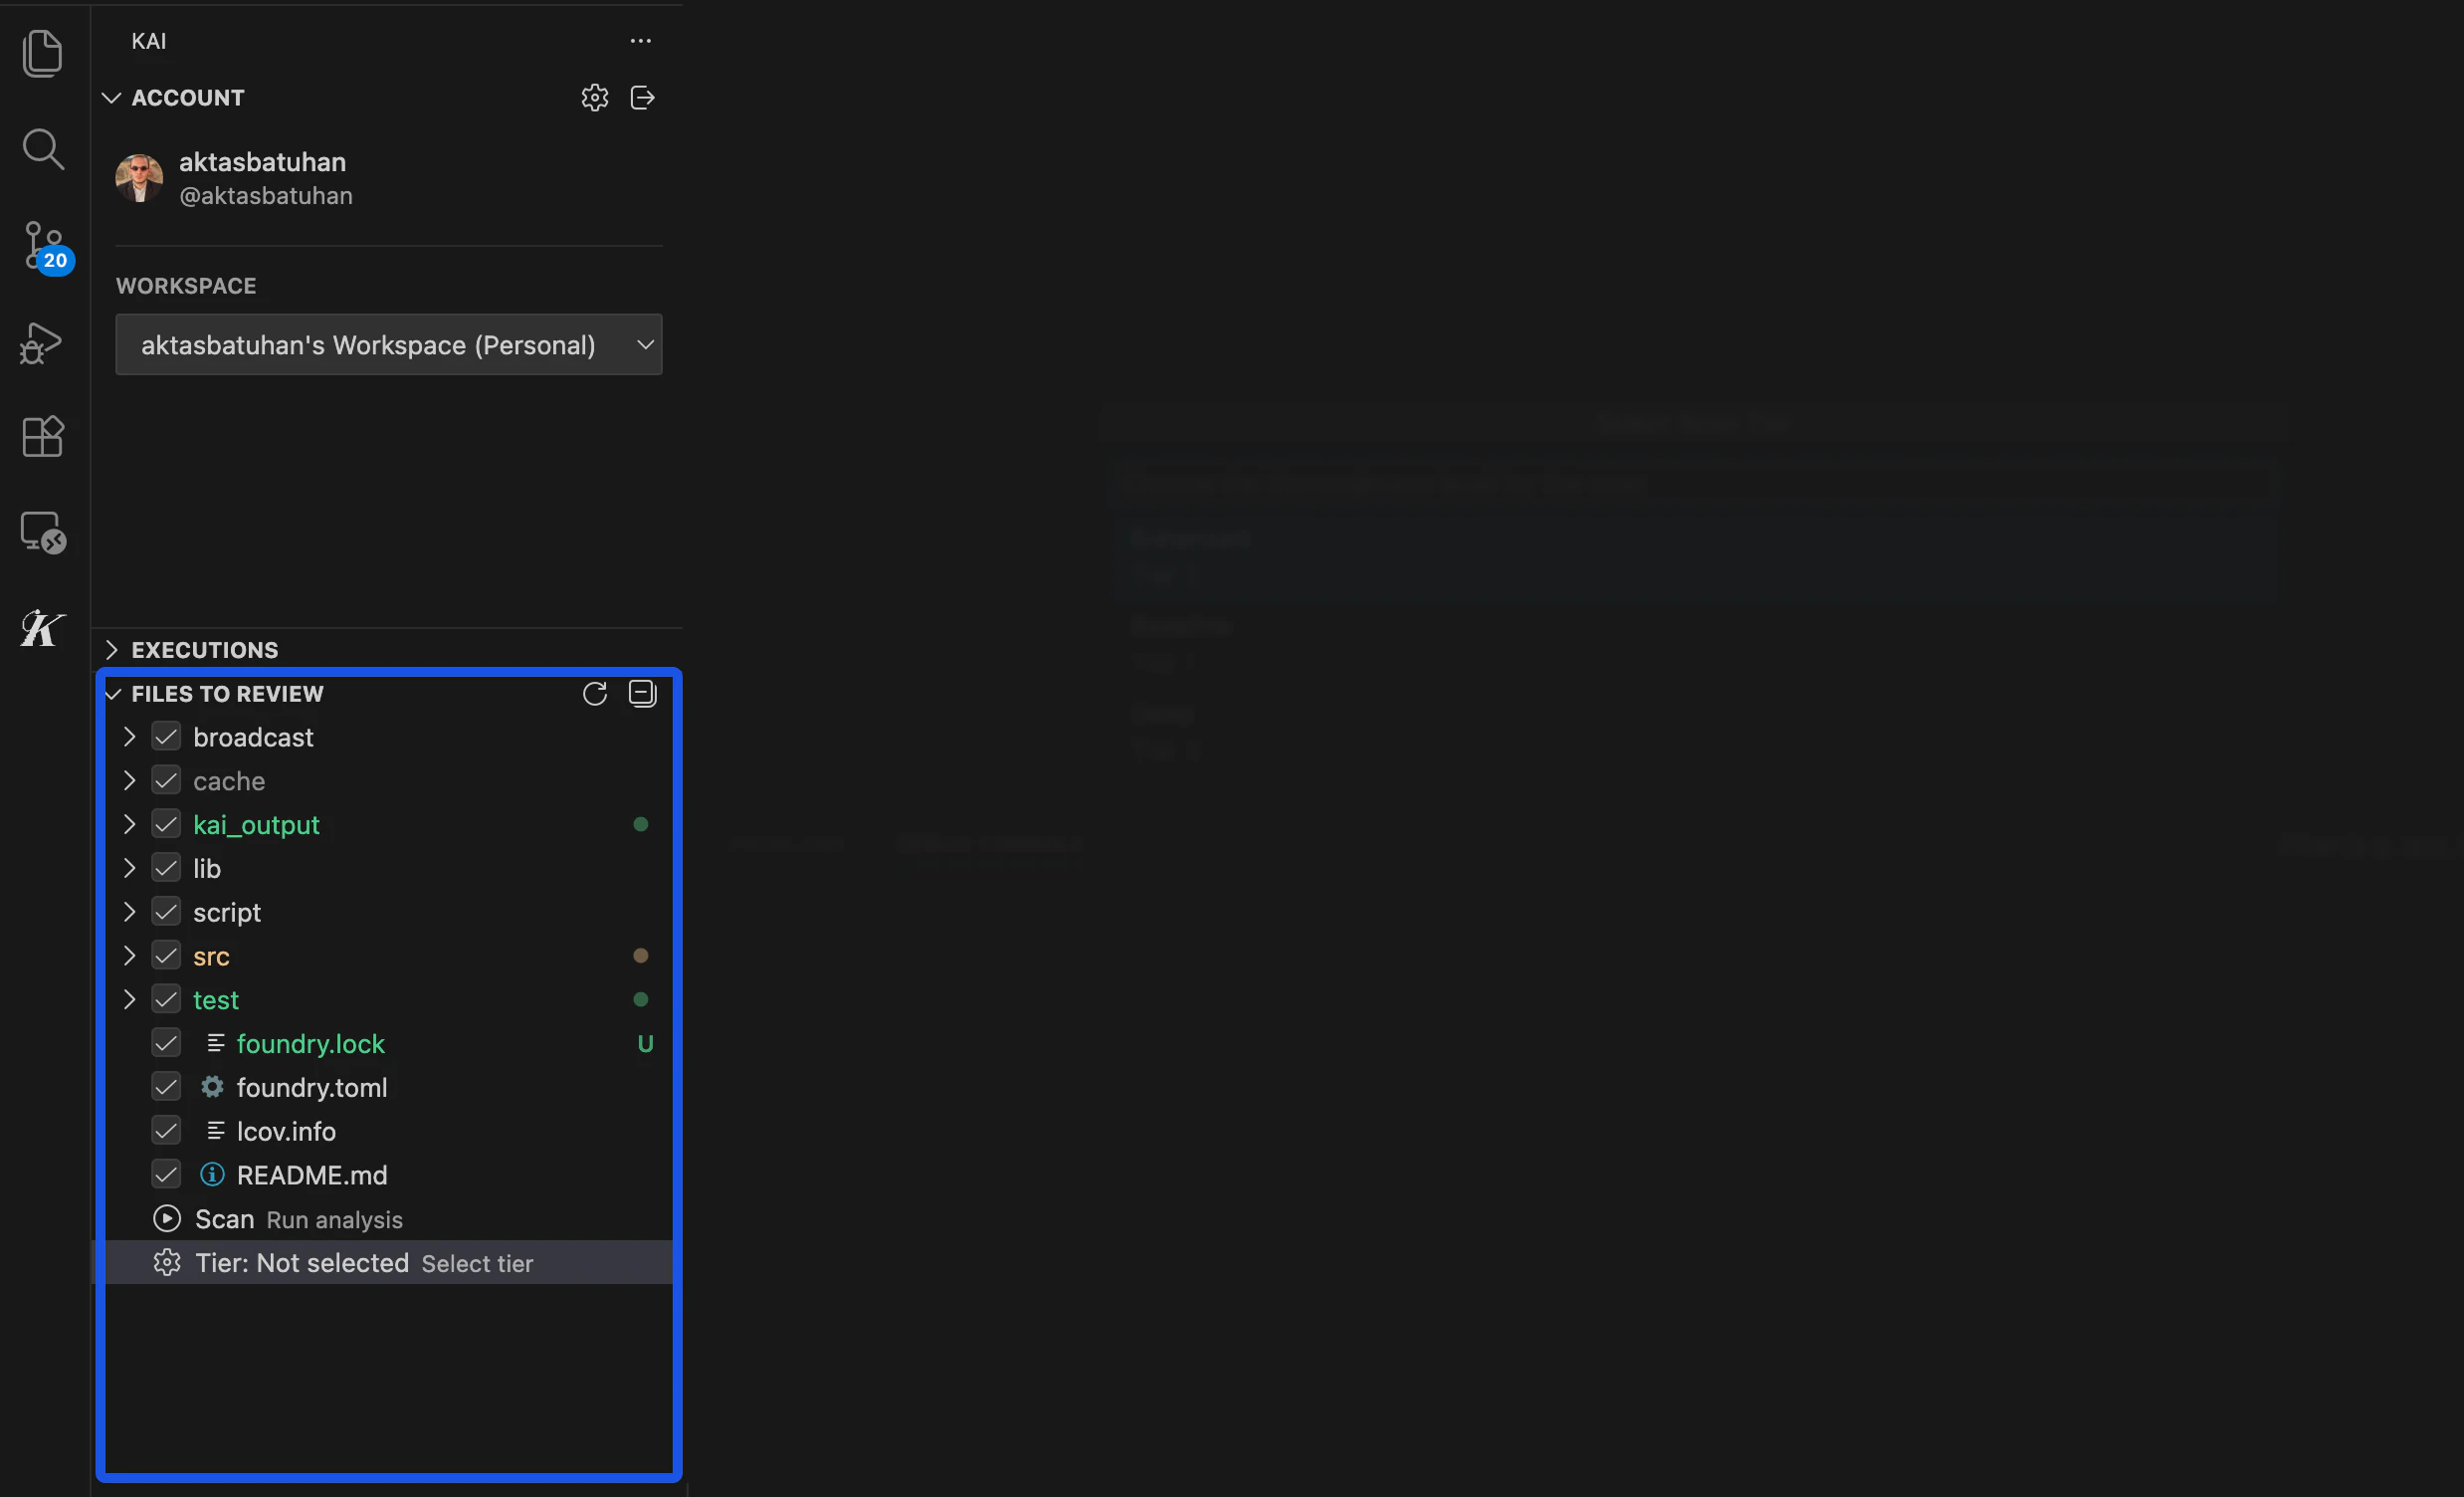
Click the Kai icon in the Activity Bar (left sidebar). You should see several panels: Account showing your logged-in user information, Files to Review displaying project files available for scanning, Executions containing your scan history, and Scan Results where completed scan findings appear.
Step 2: Select Files for Scanning
Understanding the File Tree
The Files to Review panel displays your project with checkboxes. Checked files will be included in the scan, unchecked files will be skipped, and grayed out files are automatically excluded (config files, dependencies).
Choosing Files Strategically
For your first scan, focus on core application logic files, API endpoints and handlers, authentication and authorization code, database interaction code, and business logic algorithms. Kai automatically excludes configuration files like .env and .gitignore, dependencies such as node_modules/ and vendor/, binary files and assets, and test files (though tests can be included if they contain logic worth analyzing).
Selection Tips
File Size Limit: Total selected files cannot exceed 50MB. Large files or many files may hit this limit.
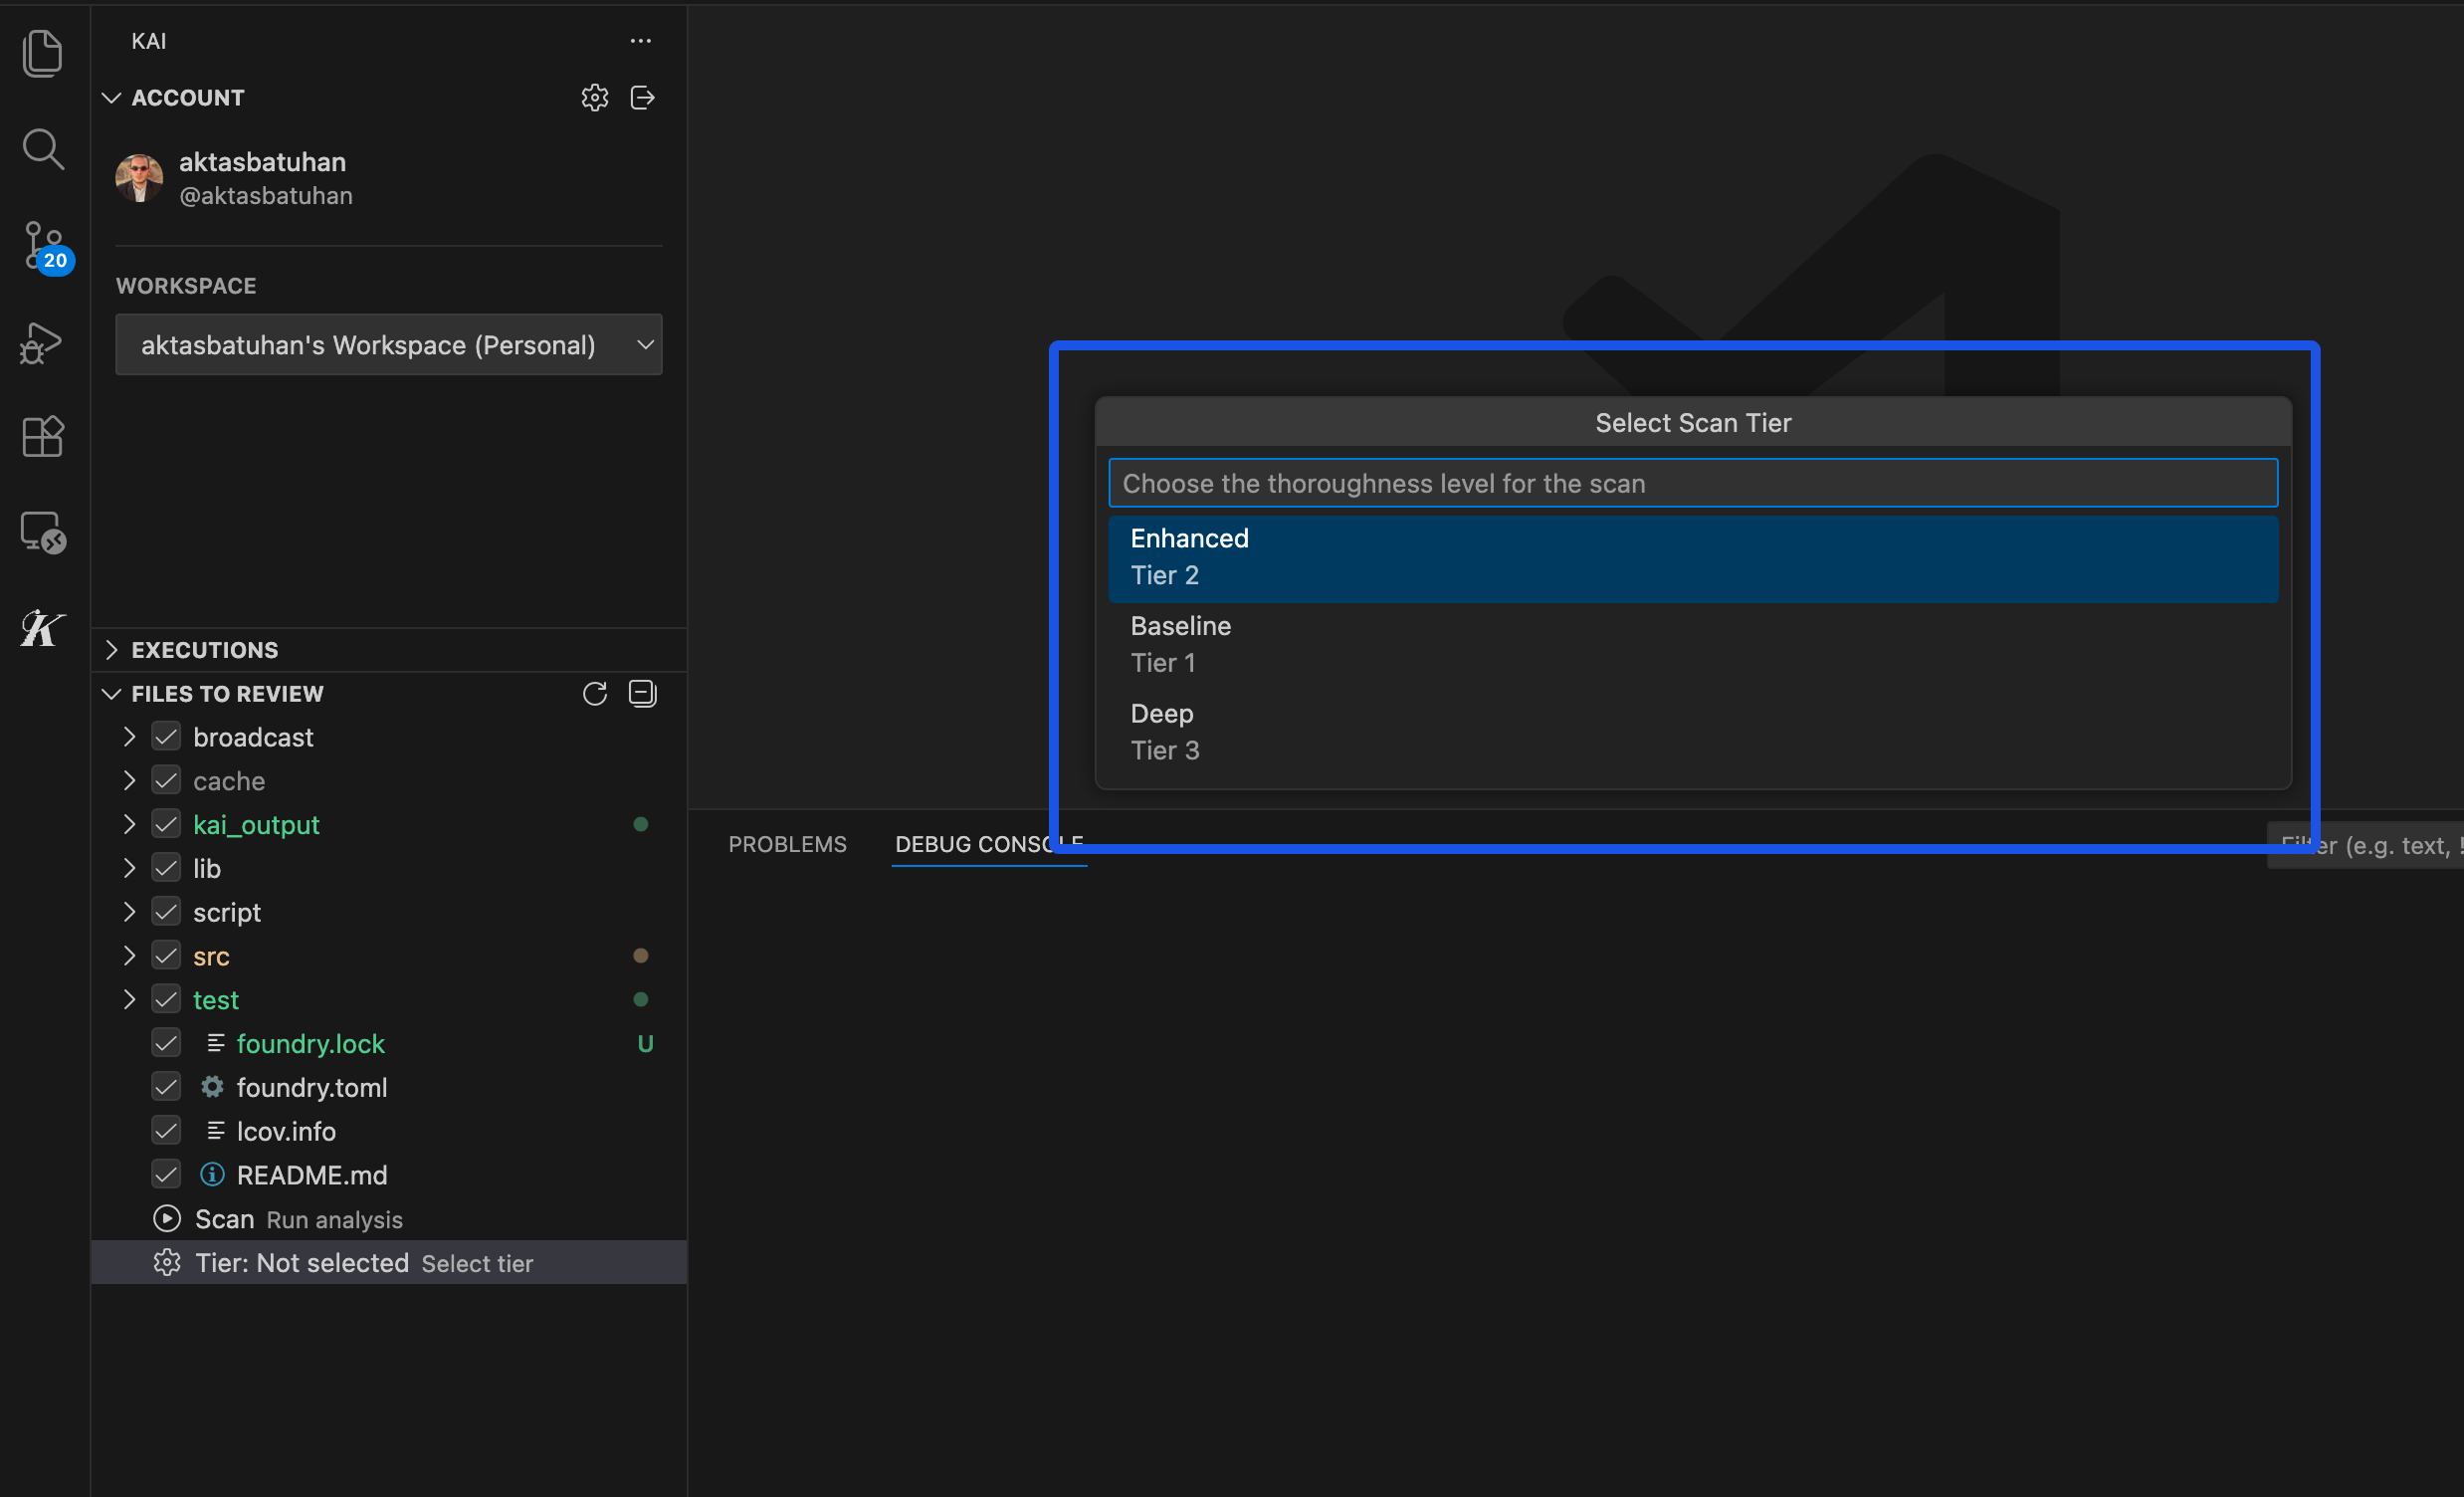
Step 3: Choose Your Scan Mode
With files selected, click the Scan button. A scan mode dialog appears with three options:
🔥 Baseline (~2 hours): Best for rapid prototypes, initial code review, and time-sensitive projects with core vulnerability pattern coverage.
🎯 Enhanced (~4 hours, recommended): Ideal for most production code with balanced speed versus thoroughness and comprehensive analysis.
🔍 Full (~8 hours): Perfect for critical systems, pre-production audits, and complex protocols requiring maximum thoroughness.
First scan recommendation: Choose Enhanced mode for thorough analysis without the time commitment of Full mode.
Step 4: Monitor Scan Progress
After selecting your mode, Kai bundles your selected files, securely uploads them to the cloud runtime, shows an “Upload successful” confirmation, and immediately begins the scan.
The Executions panel displays your scan ID (unique identifier), status (Initializing → Running → Completed), repository being analyzed, start timestamp, and refresh button for manual updates.
Background Processing
The scan runs in Kai’s cloud infrastructure, so you can close VS Code and the scan continues. Reopen later to check progress, and results are always available when you return.
What’s Happening Behind the Scenes
While your scan runs, Kai analyzes code structure and identifies entry points, generates security rules that should hold, launches specialized analysis to test different vulnerability types, attempts to exploit potential issues, verifies findings with working proof-of-concept code, and generates fix suggestions for confirmed vulnerabilities.
Step 5: Scan Completion and Results
When complete, you’ll receive a VS Code notification: “Scan completed - found X verified vulnerabilities.” Go to the Scan Results panel to see a summary showing total vulnerabilities by severity, verification status of findings, and quick actions to review results.
Severity Distribution
Results are organized by severity: Critical (immediate security risks like RCE and privilege escalation), High (significant vulnerabilities such as authentication bypass and data exposure), Medium (important issues requiring attention including logic flaws and DoS), and Low (minor security improvements).
What Makes Results Trustworthy
Unlike static analysis tools, every Kai finding includes working exploit code that proves the vulnerability, detailed explanation of the attack vector, suggested fix with code changes, and verification status confirming it’s real.
Typical First Scan Results
Most projects have 3-15 total vulnerabilities across all severities, with 1-3 Critical or High severity issues and several Medium/Low priority improvements. Don’t panic if you see many findings - each includes clear fix instructions, many are minor improvements rather than urgent risks, and Kai provides prioritization guidance.
Next Steps
Troubleshooting First Scan Issues
Scan Stuck or Failed
Problem: Scan stays in “Initializing” or “Running” status
Solutions: Wait at least 30 minutes (large projects take time), check the Executions panel refresh button, ensure internet connectivity, contact support if stuck >24 hours.
No Results or Empty Results
Problem: Scan completes but shows no vulnerabilities
Possible reasons: Very secure code (congratulations!), limited file selection (try including more files), unsupported language/framework (check compatibility), configuration files only (include actual application logic).
File Size Errors
Problem: “File size limit exceeded” error
Solutions: Uncheck large files or binaries, focus on core logic files only, split large projects into multiple scans, check for accidentally included dependencies.
Authentication Issues During Scan
Problem: “Authentication failed” during scan submission
Solutions: Sign out and sign back in, check internet connectivity, verify GitHub account access, clear VS Code workspace and reload.
Remember: Your first scan is a learning experience. Don’t worry about finding many vulnerabilities - focus on understanding the results and improving your code security practices.
Ready to dive deeper into your scan results? Continue to Understanding Results.