
Installing the Kai VS Code Extension
Get the Kai VS Code extension installed and configured in just a few minutes.Installation Methods
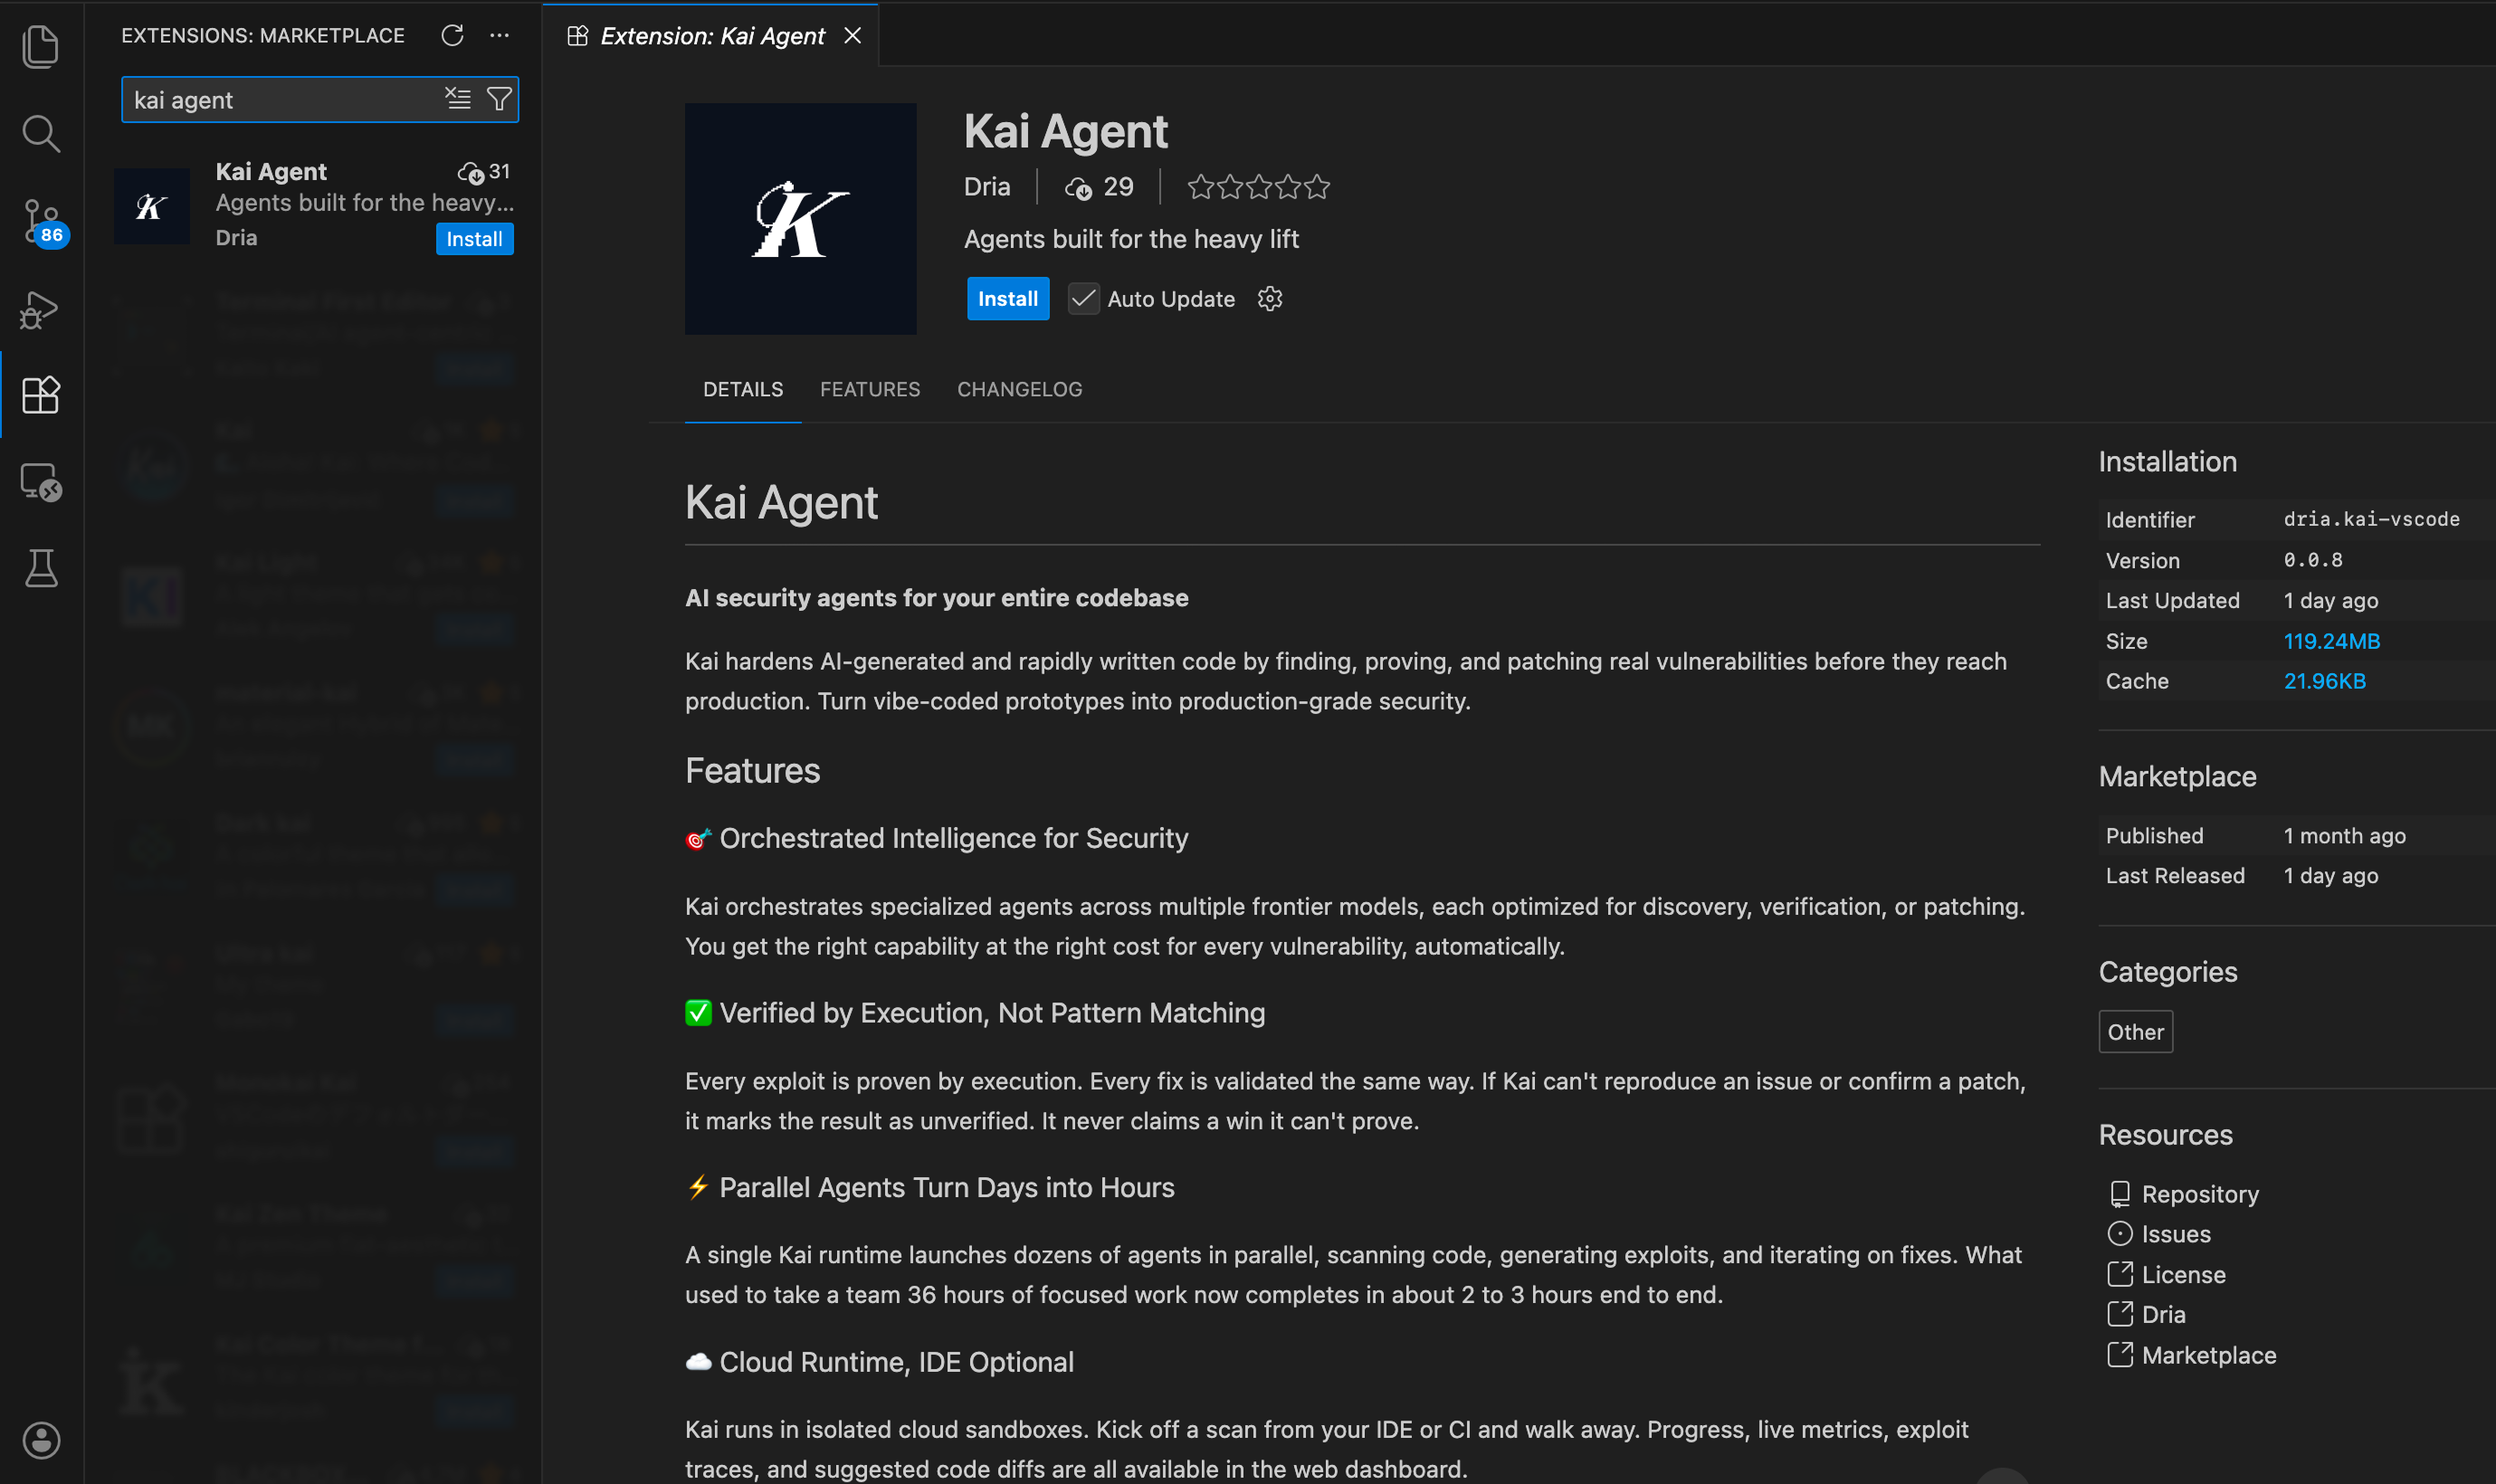
Method 1: VS Code Marketplace (Recommended)
- Open VS Code
- Click the Extensions icon in the Activity Bar (
Ctrl+Shift+XorCmd+Shift+X) - Search for “Kai Agent”
- Find the extension by Dria (Publisher: Dria)
- Click Install
Method 2: Direct Download
- Visit the VS Code Marketplace page
- Click Install to launch VS Code automatically
- Alternatively, download the
.vsixfile and install manually
Method 3: Command Palette
- Press
Ctrl+Shift+P(orCmd+Shift+Pon Mac) - Type
Extensions: Install Extensions - Search for “Kai Agent” by Dria
- Click Install
Verification
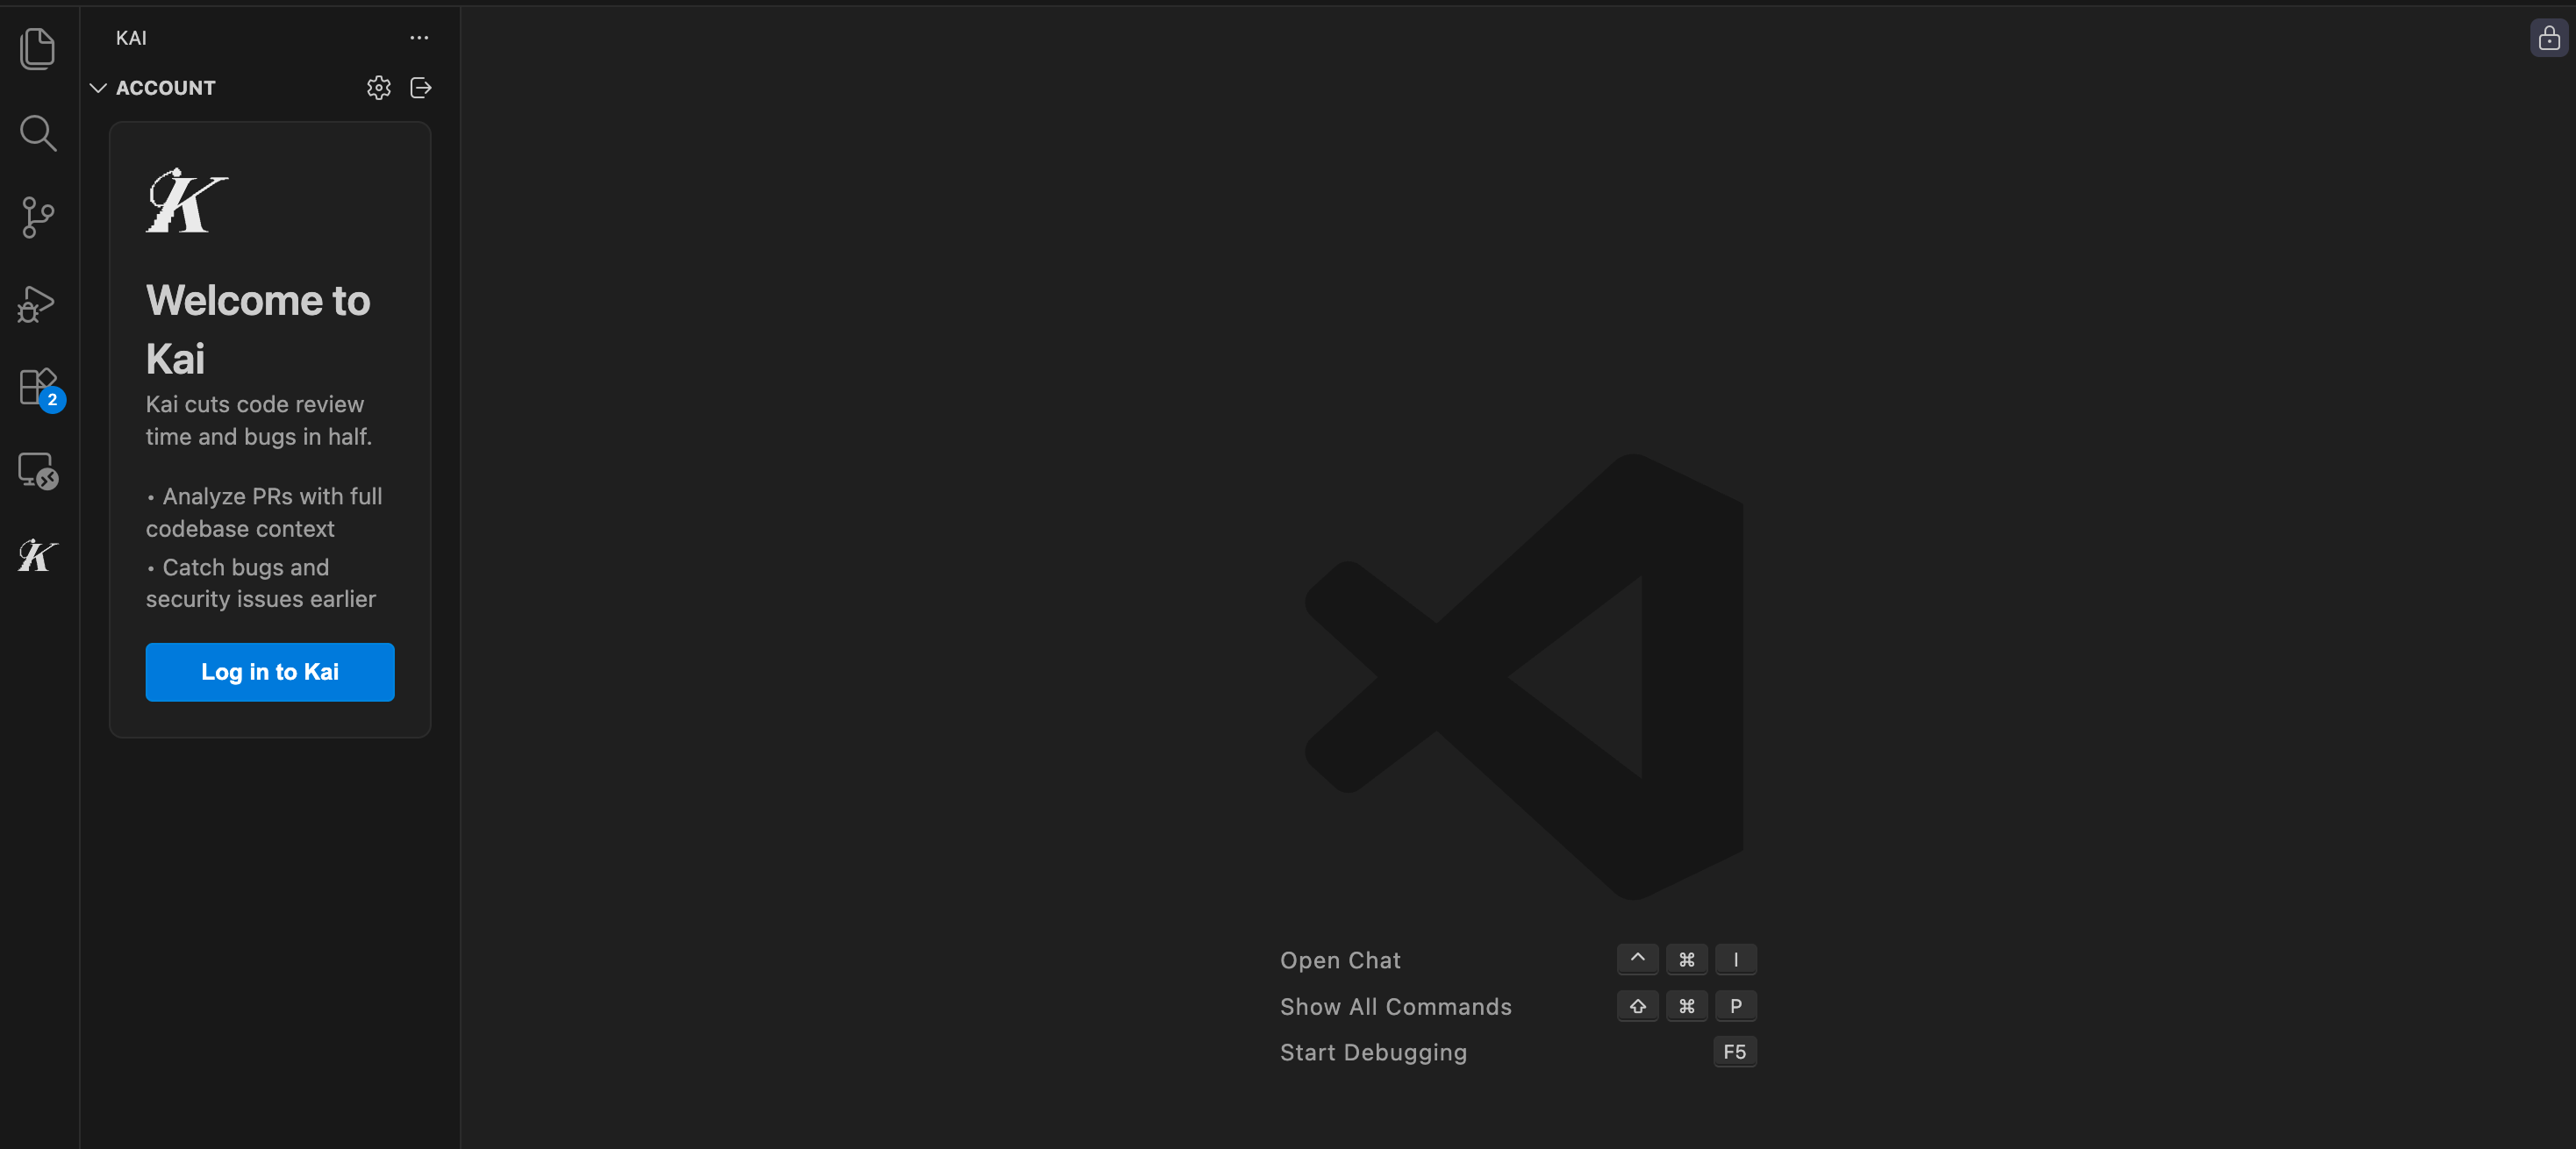
After installation, verify Kai is working correctly:- Check Activity Bar: Look for the Kai icon (should appear in the left sidebar)
- Open Kai Panel: Click the Kai icon to open the main panel
- Check Status: You should see login options and extension information
Initial Configuration
Setting Up Authentication
- Click the Kai icon in the Activity Bar
- In the main panel, click Sign In
- Your default browser will open to GitHub OAuth
- Sign in to your GitHub account
- Authorize Kai to access your account information
- Return to VS Code - you should see your account details
Workspace Setup
- Open a folder containing code you want to scan
- Ensure it’s a git repository:
- The Kai panel should now show your project files
Key Features
Abort a Running Scan
Need to cancel a scan that’s in progress? Click the stop icon next to the execution in the Executions panel. A confirmation dialog appears before the scan is aborted.View Fix Diffs
For each vulnerability, you can view the suggested fix as a side-by-side diff directly in VS Code. Click the diff icon on any exploit item in the Scan Results panel to see the before-and-after code changes.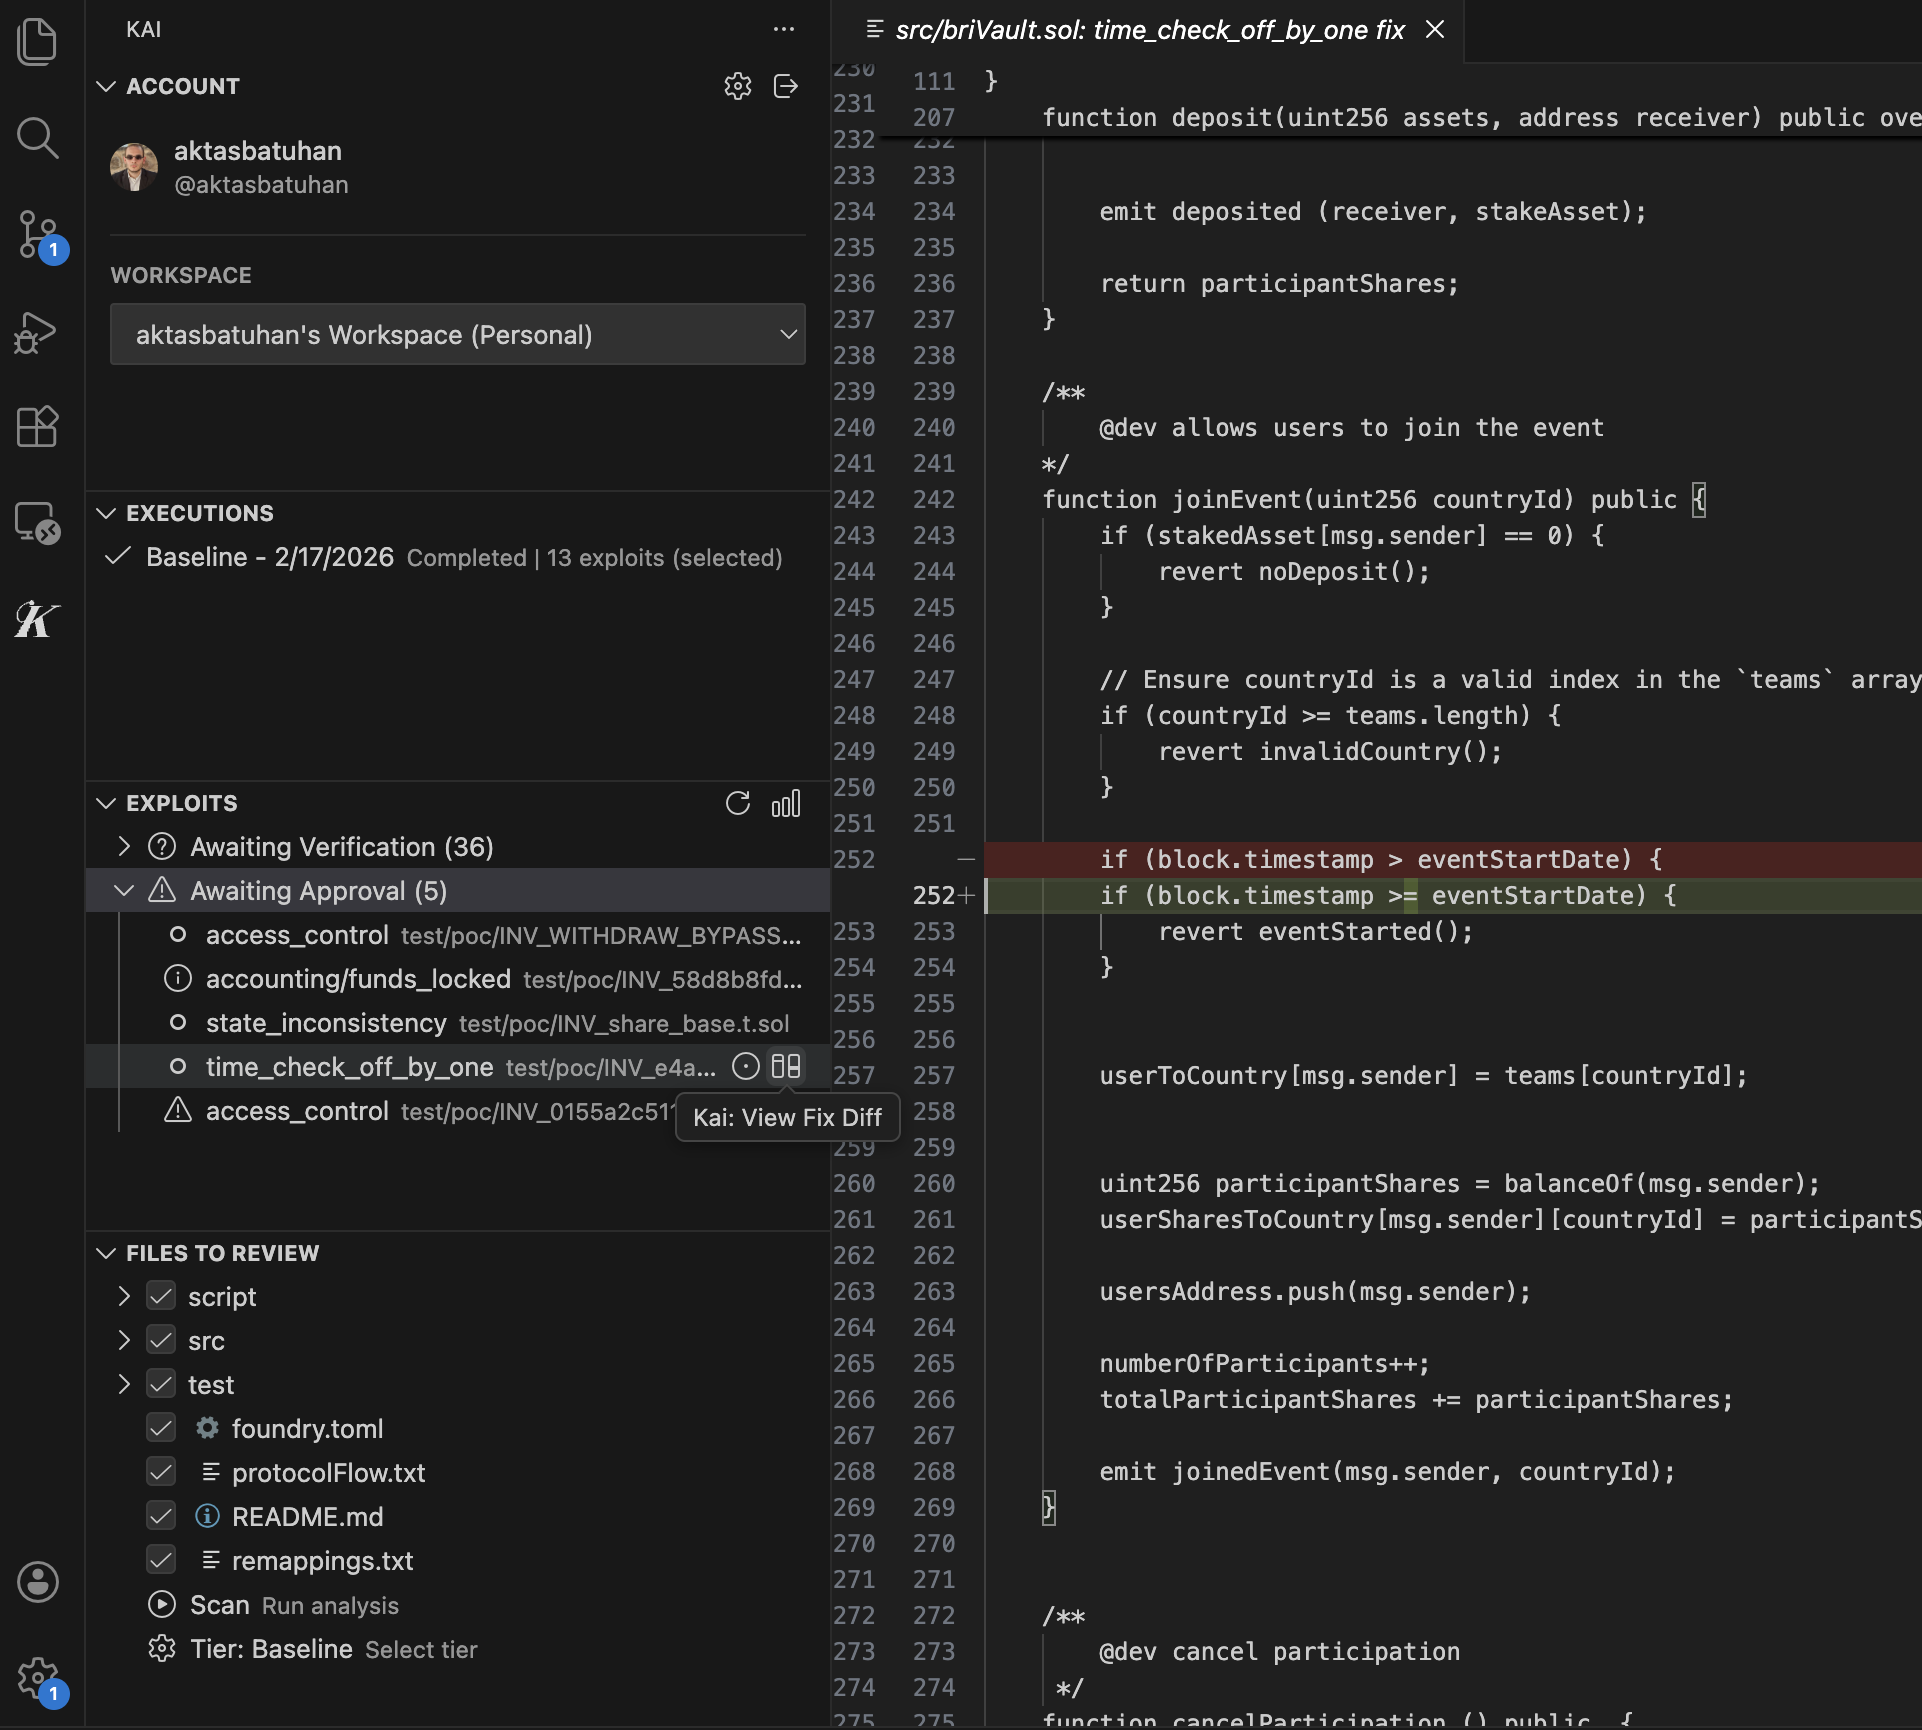
Create Issues from Exploits
Turn vulnerability findings into trackable issues in GitHub or Linear without leaving VS Code. Click the issues icon on any exploit item, choose your integration, and select the target repository or team.Extension Settings
Access Kai settings through VS Code’s Settings UI or the Kai Settings button:File Exclusions
Kai automatically excludes common files but you can customize:- Configuration files (
.env,.gitignore, etc.) - Dependencies (
node_modules,vendor, etc.) - Binary files and assets
Troubleshooting Installation
Extension Not Appearing
Problem: Kai icon doesn’t show in Activity Bar Solutions:- Restart VS Code completely
- Check Extensions view to confirm installation
- Try disabling and re-enabling the extension
- Ensure VS Code version meets requirements (1.80.0+)
Authentication Issues
Problem: Can’t sign in or authentication fails Solutions:- Check your internet connection
- Ensure GitHub is accessible from your network
- Clear browser cache and cookies
- Try signing in with an incognito/private browser window
- Disable browser extensions that might block OAuth
Permission Errors
Problem: Extension can’t access files or git repository Solutions:- Ensure you have read access to the project folder
- Check git repository status:
git status - Verify git is properly configured
- Try opening VS Code as administrator (Windows) or with appropriate permissions
Network/Firewall Issues
Problem: Can’t connect to Kai’s cloud runtime Solutions:- Check corporate firewall settings
- Ensure these domains are accessible:
kai.dria.costaging.kai.dria.cogithub.com(for authentication)
- Contact your IT administrator if needed
Updating the Extension
Kai automatically updates through VS Code’s extension system:- Updates are downloaded automatically
- You’ll see a notification when an update is available
- Restart VS Code to apply updates
- Check the changelog for new features
Manual Update Check
- Go to Extensions view (
Ctrl+Shift+X) - Find Kai Agent in your installed extensions
- Click the gear icon → “Check for Updates”
Uninstalling
If you need to remove Kai:- Go to Extensions view
- Find Kai Agent
- Click the gear icon → “Uninstall”
- Restart VS Code to complete removal
Next Steps
Once installed and configured:- Run Your First Scan - Complete walkthrough of the scanning process
- Understanding Results - Learn how to interpret findings
- Managing Vulnerabilities - Master the workflow system